TranceParent Guide
- What the heck is TranceParent?
- Media Layers
- Media Layer Settings - Images
- Media Layer Settings - Audio
- Media Layer Settings - Video
- File Compatibility
- Text Layers
- Binaural Layers
- Metronome Layers
- Frequently Asked Questions
What the heck is TranceParent?
What is TranceParent
Layers
Media Layers
Media Layer Settings - Images
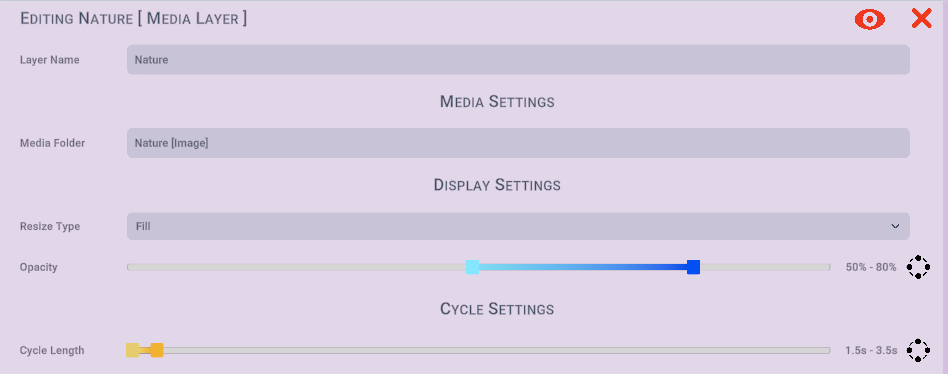
Settings
Media Folder: This is the selected folder of media files for the layer. Clicking on the field will prompt you to browse and select a folder on your computer or device. The layer will then use the image files in this folder to cycle through randomly according to the other settings. The settings will also change depending on the type of media in this folder.
Resize Type: This will change the way the images are shown on the screen and how they are scaled. The current options are as follows:
- Stretch: This will make the image cover the full screen, showing all contents of the image, ignoring aspect ratio. This may cause the image to be distorted.
- Fit: This will cause the image to be resized to fit in the screen, but may not cover the entire screen leaving portions on the sides or top or bottom that are not covered.
- Fill: This will cause the image to cover the full screen, zooming in and centering on it, clipping off portions of the image to ensure it fits the screen. It will not be distorted but will not always show the whole image.
- Actual Size: This will display the image centered as the actual size of the image. It may not cover the full screen or it may go off the screen depending on the actual size of the image.
Opacity: This is used to set the transparency level of this layer. The lower the number, the more see-thru the layer becomes allowing you to see layers below it. If you click the button on the right size of the row, you can toggle different methods of setting this value. Range Slider allows you to set a min and max amount of opacity, which will make it select a random amount between those 2 sliders. Slider allows you to select a value for the opacity directly. Input Field lets you specify the opacity as a decimal value 0 being completely transparent and 1.0 being fully opaque. Lastly disabled causes the layer to be completely opaque the same as setting the value to 1.0.
Cycle Length: This determines how long each cycle of the layer will last in seconds. Each cycle the layer will select a media file from the Media Folder and display it for this duration. If you click the button on the right size of the row, you can toggle different methods of setting this value. Range Slider allows you to set a min and max duration, which will make it select a random amount between those 2 sliders. Slider allows you to select a value for the duration directly. Input Field lets you specify the duration as a decimal value in seconds. Lastly disabled causes the layer display for only the amount of time it takes to load the next file.
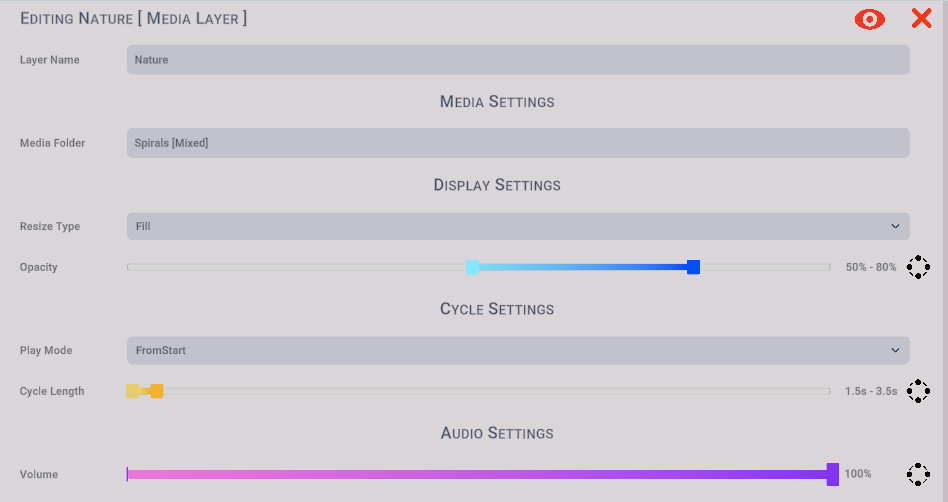
Media Layer Settings - Audio

Media Layer Settings - Video
File Compatibility
Image Formats:
- png
- gif
- jpg / jpeg
- bmp
- tif
- tga
- webp
Audio Formats:
- mp3
- ogg
- wav
- flac
- aif
Video Formats:
- mp4
- avi ( Windows Only )
- mov
- ogv
- mpg / mpeg
- m4v
- webm ( Linux only supports webm currently)
Video Codec Information:
For most plaftforms, H.264 (typically in a .mp4, .m4v, or .mov format) is the optimal supported video codec because it offers the best cross-platform compatibility. Linux is the notable exception.
For Linux, the optimal encoding is usually a .webm container with video tracks encoded using the VP8 codec, and audio encoded using the Vorbis codec.
Text Layers
Text Layer Settings

Settings
Input Type:
Text Values:
Text Location:
Line Selection Type:
Opacity:
Cycle Length:
Number of Texts:
Font Size:
Font Colors:
Other Notes
Binaural Layers
Binaural Layer Settings
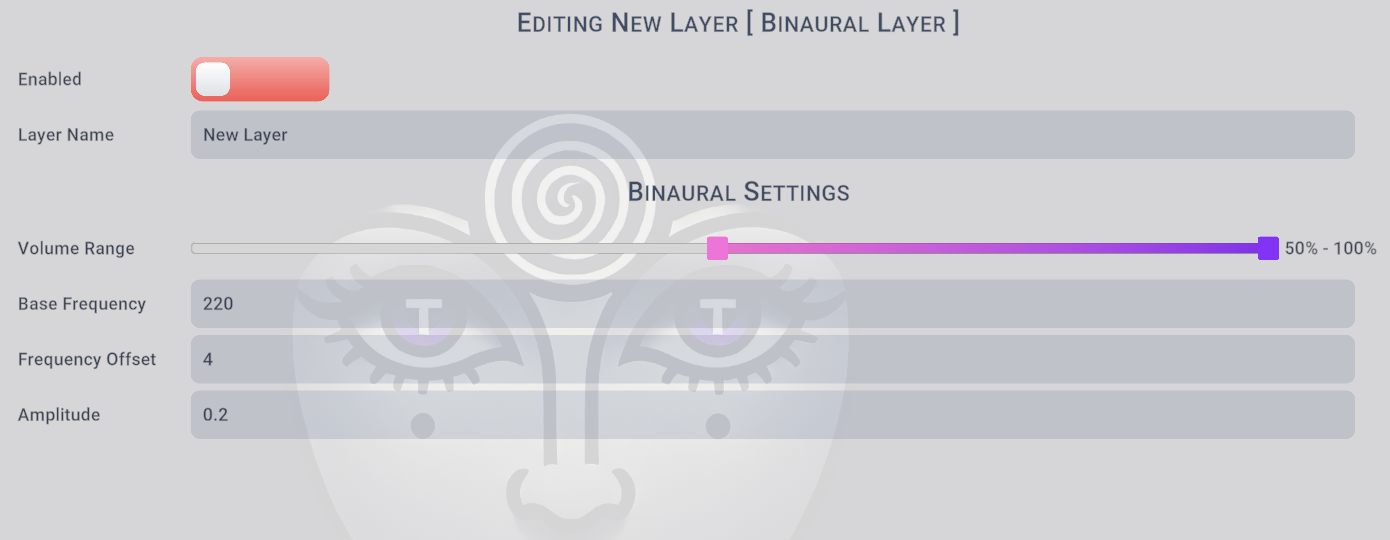
Settings
Volume Range: This sets a range of volume to be randomly generated at. Generally for a binaural layer you would want it to be low so as not to have it overwhelming the rest of the audio. The randomness currently doesn't serve much purpose however it will later be used to have it changing with other functionality and features in the app.
Base Frequency: This is the carrier tone, the main sound you'll be hearing. The lower the value the lower pitch the sound is, the higher the value the higher pitch the sound is.
Frequency Offset: This is the difference in frequency between the two sounds presented to your ears. To induce alpha or theta waves, aim for a frequency offset within the respective ranges (8-14HZ for alpha, 4-8 for theta).
Amplitude: This refers to the intensity of the sound, you'll want a comfortable but noticeable level, but not so loud that it becomes overwhelming or distracting. Generally you'll want to adjust it to the point where you can clearly hear the sound without it being too loud.
Other Notes
Feel free to search online or use AI's to help figure out the values you want to set these at. If you include in your search the variables presented here and the desired mental state, the results should be able to help narrow down the desired settings.
Metronome Layers
Metronome Layer Settings
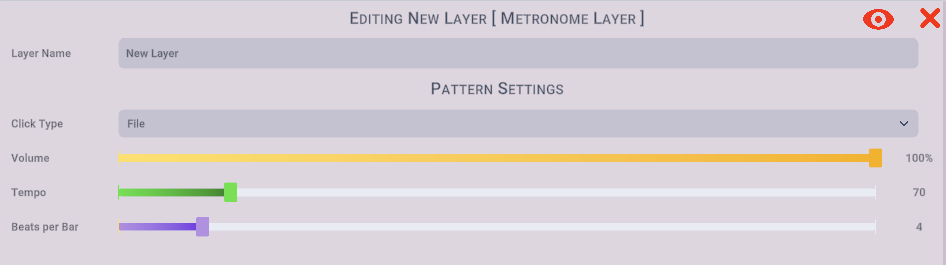
Settings
Click Type:
Volume:
Tempo:
Beats per Bar: This refers to how frequently the alternative click sound plays
Other Notes
Frequently Asked Questions
App is damaged and can't be opened.
This is a MacOS error due to the way apple signs it's files. Compressing them and transferring them over the internet (so you can download it), causes the signing to no longer apply properly.
To fix this, you will need to run a series of commands in the terminal to fix it and remove it from apple's quarantine. Follow these steps to do so:
- Open Terminal
- Enter in "xattr -l " (make sure to include the space at the end, but don't include the quotes)
- Drag the TranceParent.app file into the terminal and hit the enter key
- Enter in "xattr -dr com.apple.quarantine " (make sure to include the space at the end, but don't include the quotes)
- Drag the TranceParent.app file into the terminal and hit the enter key
- Right click TranceParent.app and click open